
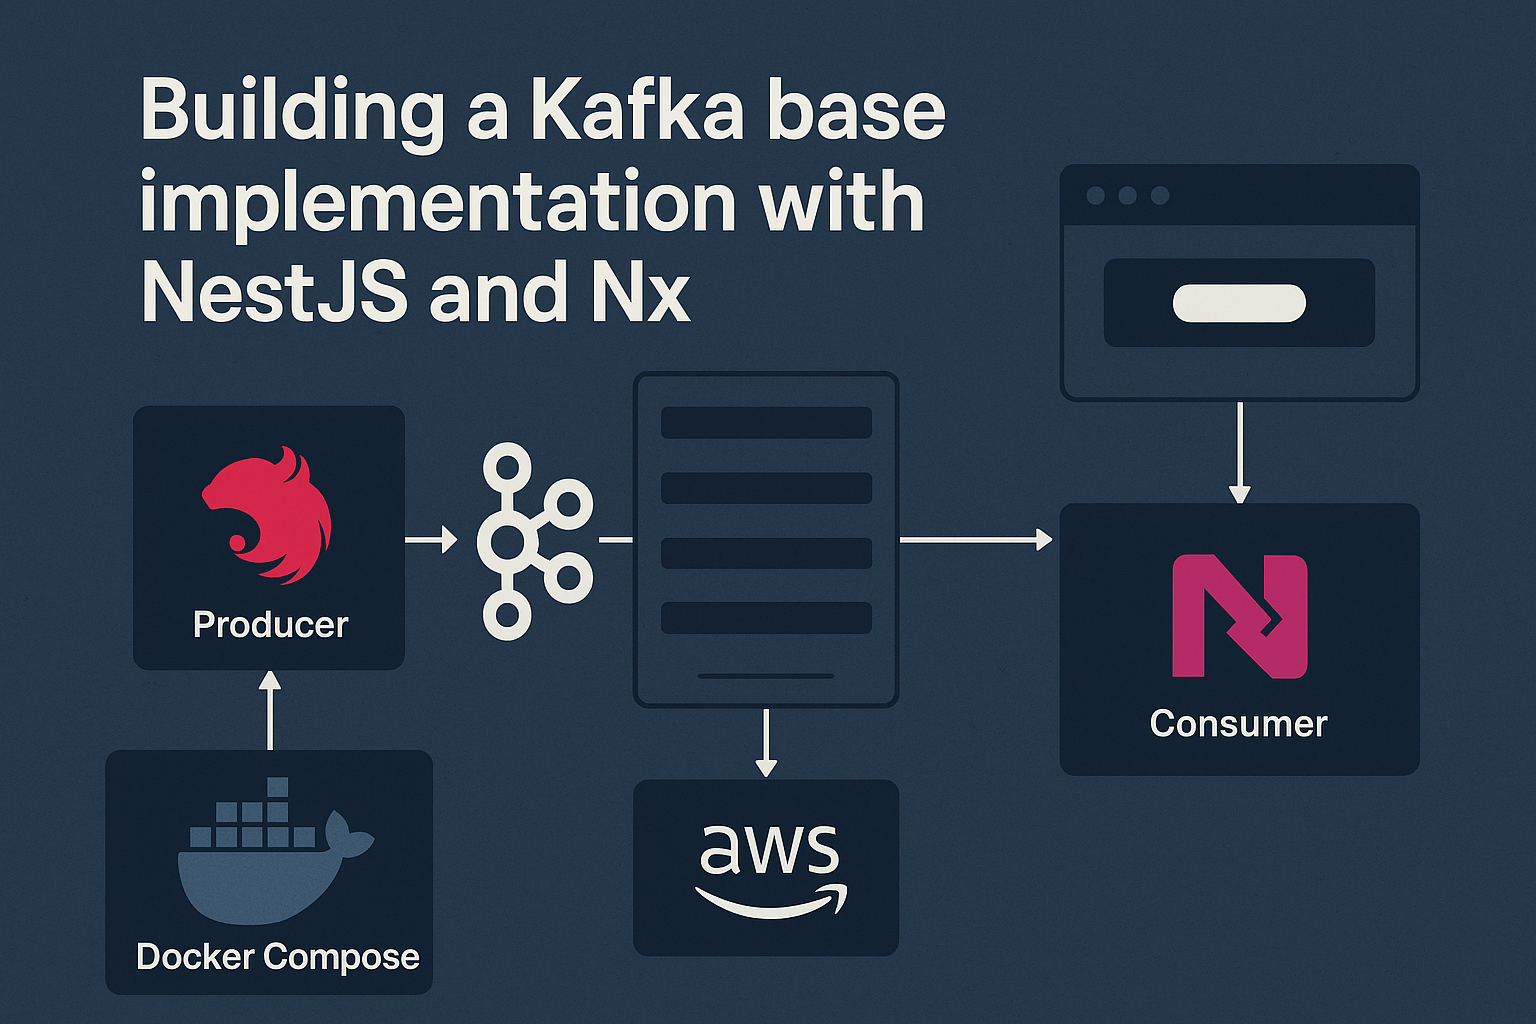
Hey there! In this post, I want to walk through a base implementation I created to work with Kafka, NestJS, and Nx.
Kafka is one of those technologies that looks simple when the diagram has only arrows and topics, but when you start coding, a few practical questions show up really fast:
- Where should the Kafka client live?
- How do producer and consumer apps share event contracts?
- How do we create topics locally?
- How do we test the full message flow without deploying infrastructure?
- How do we avoid copying the same Kafka setup into every NestJS application?
This post uses the kafka-base-implementation project as the base for answering those questions.
Context 🧠
I like to create these base projects because they force me to answer the boring but important questions before adding business complexity. Kafka is a good example of that. Publishing and consuming messages is not hard by itself, but organizing the project in a way that can grow is where things can get messy.
For this project, I wanted something simple enough to understand in a few minutes, but complete enough to be reused later. So instead of creating only one NestJS app with a Kafka consumer inside it, I created a small system with:
- one API that produces messages;
- one API that consumes and processes messages;
- a shared library with Kafka infrastructure;
- a shared component with topic names and event contracts;
- a dashboard to trigger the flow from the browser;
- Docker Compose with Kafka and Kafka UI.
The final code is available here:
https://github.com/nestjsninja/kafka-base-implementation
Target 🎯
The target is not to build a complex event-driven architecture with many services, retries, dead-letter topics, schemas, and observability from day one.
The target is to create a small foundation that answers the first implementation questions and gives us a clean starting point for new NestJS applications that need Kafka messaging.
In other words, I wanted the project to prove this flow:
HTTP request -> producer-api -> Kafka -> consumer-api -> Kafka -> producer-api
And I wanted the reusable Kafka code to live outside the applications, so the apps can focus on their responsibilities.
Project structure 🗂️
The repository is organized like this:
apps/
  producer-api/
  consumer-api/
  dashboard/
libs/
  core/
    env/
    kafka/
  components/
    example-messaging/
docker-compose.yml
Each folder has a clear responsibility:
apps/producer-apiexposes an HTTP endpoint that publishes a message to Kafka.apps/consumer-apiconsumes the message, processes it, and publishes another event back.apps/dashboardgives a browser interface for triggering the flow and checking the result.libs/core/kafkacontains the reusable Kafka module, service, admin service, and configuration helpers.libs/components/example-messagingcontains the example topic names, topic configuration, event interfaces, and messaging service.docker-compose.ymlstarts Kafka and Kafbat Kafka UI for local development.
This structure is important because Kafka code can become duplicated very quickly. If every app creates its own client, topic constants, event interfaces, and admin logic, the system becomes harder to maintain with each new service.
By the way, there is no magical structure here. The important decision is the boundary: application code stays inside apps, reusable Kafka infrastructure stays inside libs/core/kafka, and the example domain messaging code stays inside libs/components/example-messaging.
Running the project locally 🚀
The project targets Node.js 22. After cloning the repository, install the dependencies:
npm install
Create the local environment file:
cp .env.example .env
Then start Kafka, Kafbat UI, both APIs, and the dashboard:
npm run dev
The main local URLs are:
| Service | URL |
|---|---|
| Producer API | http://localhost:3000/api |
| Consumer API | http://localhost:3001/api |
| Dashboard | http://localhost:4200 |
| Kafka UI | http://localhost:8080 |
| Kafka broker | localhost:9094 |
Docker and Kafka UI 🐳
The local Kafka setup is handled by Docker Compose. The project starts two containers:
kafka, using theapache/kafka:3.9.1image.kafka-ui, using theghcr.io/kafbat/kafka-ui:latestimage.
The Kafka container includes a health check, so docker compose up --wait only finishes after the broker is ready to accept connections. That is useful because the NestJS applications start right after Kafka, and without a health check you can easily hit connection errors during startup.
Kafka uses two listeners in Docker Compose:
kafka:9092for services running inside Docker, like Kafbat UI.localhost:9094for the NestJS apps running on the host machine.
That small detail avoids a common local Kafka problem: the broker is reachable from Docker, but not from the application running directly on your machine.
Kafbat Kafka UI runs at:
http://localhost:8080
It is helpful while developing because you can inspect the cluster, topics, partitions, consumer groups, and messages without writing extra scripts. For this demo, you can publish a message from the dashboard, open Kafka UI, and confirm that the example.message.created and example.message.processed topics are being used.
One thing I really recommend when studying Kafka locally is keeping Kafka UI open while testing the application. It helps connect the code with what is really happening in the broker. You can see the topics, confirm the partitions, check consumer groups, and understand when a message was actually published.
This is especially useful when something does not work. Sometimes the API is running, but the consumer group is not connected. Sometimes the topic exists, but the app is listening to another topic name. Kafka UI makes those issues much easier to spot.
The message flow 🔁
The demo flow is intentionally small:
producer-apireceivesPOST /api/messages.producer-apipublishesexample.message.created.consumer-apiconsumesexample.message.created.consumer-apistores the received event in memory.consumer-apipublishesexample.message.processed.producer-apiconsumesexample.message.processed.producer-apistores the processed event in memory.
You can test it with curl:
curl -X POST http://localhost:3000/api/messages \
  -H 'Content-Type: application/json' \
  -d '{"text":"hello kafka"}'
The producer returns the topic and the event that was published:
{
  "topic": "example.message.created",
  "event": {
    "id": "...",
    "text": "hello kafka",
    "source": "producer-api",
    "createdAt": "..."
  }
}
Then you can check what the consumer received:
curl http://localhost:3001/api/received
And check what the producer received back after processing:
curl http://localhost:3000/api/processed
The processed event keeps the original data and adds the consumer result:
{
  "id": "...",
  "text": "hello kafka",
  "source": "producer-api",
  "createdAt": "...",
  "processedBy": "consumer-api",
  "processedAt": "...",
  "result": "HELLO KAFKA"
}
The in-memory arrays are only for demonstration. In a real application this could be persisted in a database, emitted through WebSockets, or used to continue another workflow.
Shared event contracts 📦
The example-messaging library owns the contracts used by both applications:
export interface ExampleMessageCreatedEvent {
  id: string;
  text: string;
  source: string;
  createdAt: string;
}

export interface ExampleMessageProcessedEvent
  extends ExampleMessageCreatedEvent {
  processedBy: string;
  processedAt: string;
  result: string;
}
It also owns the topic names:
export const EXAMPLE_TOPICS = {
  MESSAGE_CREATED: 'example.message.created',
  MESSAGE_PROCESSED: 'example.message.processed',
} as const;
This is one of the most useful parts of the monorepo approach. The producer and consumer do not need to redefine topic strings or event shapes. They import them from the same place.
That reduces simple mistakes like publishing to example.messages.created while the consumer is listening to example.message.created.
In a real project, this library is also where I would start thinking about event versioning. For example, if ExampleMessageCreatedEvent changes in the future, do we create a new topic, add optional properties, or publish a v2 event? The answer depends on the system, but the question belongs close to the event contract, not hidden inside a random service.
Publishing events 📤
The producer API creates an event and delegates the actual Kafka publishing to ExampleMessagingService:
async publishMessage(text = 'hello from producer') {
  const event: ExampleMessageCreatedEvent = {
    id: randomUUID(),
    text,
    source: 'producer-api',
    createdAt: new Date().toISOString(),
  };

  await this.exampleMessagingService.emitMessageCreated(event);

  return {
    topic: EXAMPLE_TOPICS.MESSAGE_CREATED,
    event,
  };
}
The messaging service keeps the application code clean:
@Injectable()
export class ExampleMessagingService {
  constructor(private readonly kafkaService: KafkaService) {}

  async emitMessageCreated(event: ExampleMessageCreatedEvent): Promise<void> {
    await this.kafkaService.emit(EXAMPLE_TOPICS.MESSAGE_CREATED, event);
  }

  async emitMessageProcessed(
    event: ExampleMessageProcessedEvent,
  ): Promise<void> {
    await this.kafkaService.emit(EXAMPLE_TOPICS.MESSAGE_PROCESSED, event);
  }
}
This means the app service does not need to know how the NestJS Kafka client works. It only knows the business-level action: emit a message-created event.
Consuming events 📥
On the consumer side, the Kafka controller listens for example.message.created:
@Controller()
export class AppKafkaController {
  constructor(private readonly appService: AppService) {}

  @EventPattern(EXAMPLE_TOPICS.MESSAGE_CREATED)
  async handleMessageCreated(@Payload() event: ExampleMessageCreatedEvent) {
    await this.appService.processMessage(event);
  }
}
The service stores the received message, creates the processed event, and publishes it back:
async processMessage(
  event: ExampleMessageCreatedEvent,
): Promise<ExampleMessageProcessedEvent> {
  this.receivedMessages.unshift(event);

  const processedEvent: ExampleMessageProcessedEvent = {
    ...event,
    processedBy: 'consumer-api',
    processedAt: new Date().toISOString(),
    result: event.text.toUpperCase(),
  };

  await this.exampleMessagingService.emitMessageProcessed(processedEvent);

  return processedEvent;
}
The producer API also has a Kafka controller, but it listens for example.message.processed:
@EventPattern(EXAMPLE_TOPICS.MESSAGE_PROCESSED)
handleProcessedMessage(@Payload() event: ExampleMessageProcessedEvent) {
  this.appService.recordProcessedMessage(event);
}
With this, we have a complete round trip between two NestJS applications.
The reusable Kafka module 🧩
The libs/core/kafka library is the infrastructure layer. It wraps NestJS ClientsModule with Kafka transport configuration and exports a KafkaService that application code can inject.
The module supports both sync and async registration:
KafkaModule.register({
  clientId: 'producer-api-client',
  groupId: 'producer-api-group',
  brokers: ['localhost:9094'],
});
or:
KafkaModule.registerAsync({
  ...KafkaConfig.asProvider(),
  useFactory: (config) => resolveKafkaOptions(config, options),
});
The KafkaService handles the lifecycle:
async onModuleInit(): Promise<void> {
  await this.client.connect();
}

async onModuleDestroy(): Promise<void> {
  await this.client.close();
}
And exposes simple methods for common operations:
async emit<TPayload>(topic: string, payload: TPayload): Promise<void> {
  await lastValueFrom(this.client.emit(topic, payload));
}

async emitBatch<TPayload>(
  topic: string,
  messages: TPayload[],
): Promise<void> {
  await lastValueFrom(this.client.emitBatch(topic, { messages }));
}

request<TResult = unknown, TPayload = unknown>(
  pattern: string,
  payload: TPayload,
): Promise<TResult> {
  return lastValueFrom(this.send<TResult, TPayload>(pattern, payload));
}
This wrapper gives the project one place to improve logging, error handling, batching, request-response behavior, or lower-level KafkaJS access later.
This is one of the parts I care about the most in this project. NestJS already gives us a Kafka transport, so we do not need to reinvent the whole client. But having a small wrapper makes the rest of the project easier to read and gives us a single place to evolve the Kafka behavior later.
For example, if tomorrow I decide to add more structured logs, correlation IDs, custom error handling, or metrics around published messages, I can start in KafkaService instead of searching for Kafka client usage across all applications.
Topic provisioning 🛠️
The example messaging module registers topic configuration:
export const EXAMPLE_KAFKA_TOPICS: ITopicConfig[] = [
  {
    topic: EXAMPLE_TOPICS.MESSAGE_CREATED,
    numPartitions: 3,
    replicationFactor: 1,
    configEntries: [
      {
        name: 'cleanup.policy',
        value: 'delete',
      },
      {
        name: 'retention.ms',
        value: '86400000',
      },
    ],
  },
  {
    topic: EXAMPLE_TOPICS.MESSAGE_PROCESSED,
    numPartitions: 3,
    replicationFactor: 1,
    configEntries: [
      {
        name: 'cleanup.policy',
        value: 'delete',
      },
      {
        name: 'retention.ms',
        value: '86400000',
      },
    ],
  },
];
Then MessagingInfrastructureModule uses MessagingTopicProvisionerService to ensure the topics exist during module initialization:
static register(
  options: MessagingInfrastructureModuleOptions = {},
): DynamicModule {
  const moduleOptions = normalizeMessagingInfrastructureOptions(options);

  return {
    module: MessagingInfrastructureModule,
    imports: [
      KafkaModule.registerAsync({
        ...KafkaConfig.asProvider(),
        useFactory: (config) => resolveKafkaOptions(config, options),
      }),
    ],
    providers: [
      {
        provide: MESSAGING_INFRASTRUCTURE_MODULE_OPTIONS,
        useValue: moduleOptions,
      },
      MessagingTopicProvisionerService,
    ],
    exports: [KafkaModule],
  };
}
For local development, this is convenient because the application can prepare the topics it needs. In production, you might decide to manage topics outside of the application with Terraform, Pulumi, Kubernetes operators, or another provisioning process.
The important part is that the topic definition is explicit. Even if topic creation is disabled in production, the app still has a clear list of the topics it expects.
Should the app create Kafka topics? 🤔
This depends on the environment.
For local development, I like this approach because it reduces setup friction. You clone the project, start Docker Compose, run the apps, and the topics are prepared for you.
For production, I would be more careful. In many teams, Kafka topics are infrastructure and should be managed with Terraform, Pulumi, Kubernetes operators, or another controlled process. That gives you more review and control over partitions, retention, replication, permissions, and naming.
So, the way I see it is:
- local development: app topic provisioning is practical;
- production: external topic provisioning is usually better;
- both cases: keeping the topic config explicit in the codebase is useful.
Why add a dashboard? 📊
The dashboard is not required for Kafka, but it makes the example easier to understand.
Instead of running curl commands in three terminals, you can open:
http://localhost:4200
From there, you can publish a message, refresh received messages, refresh processed messages, and open Kafka UI.
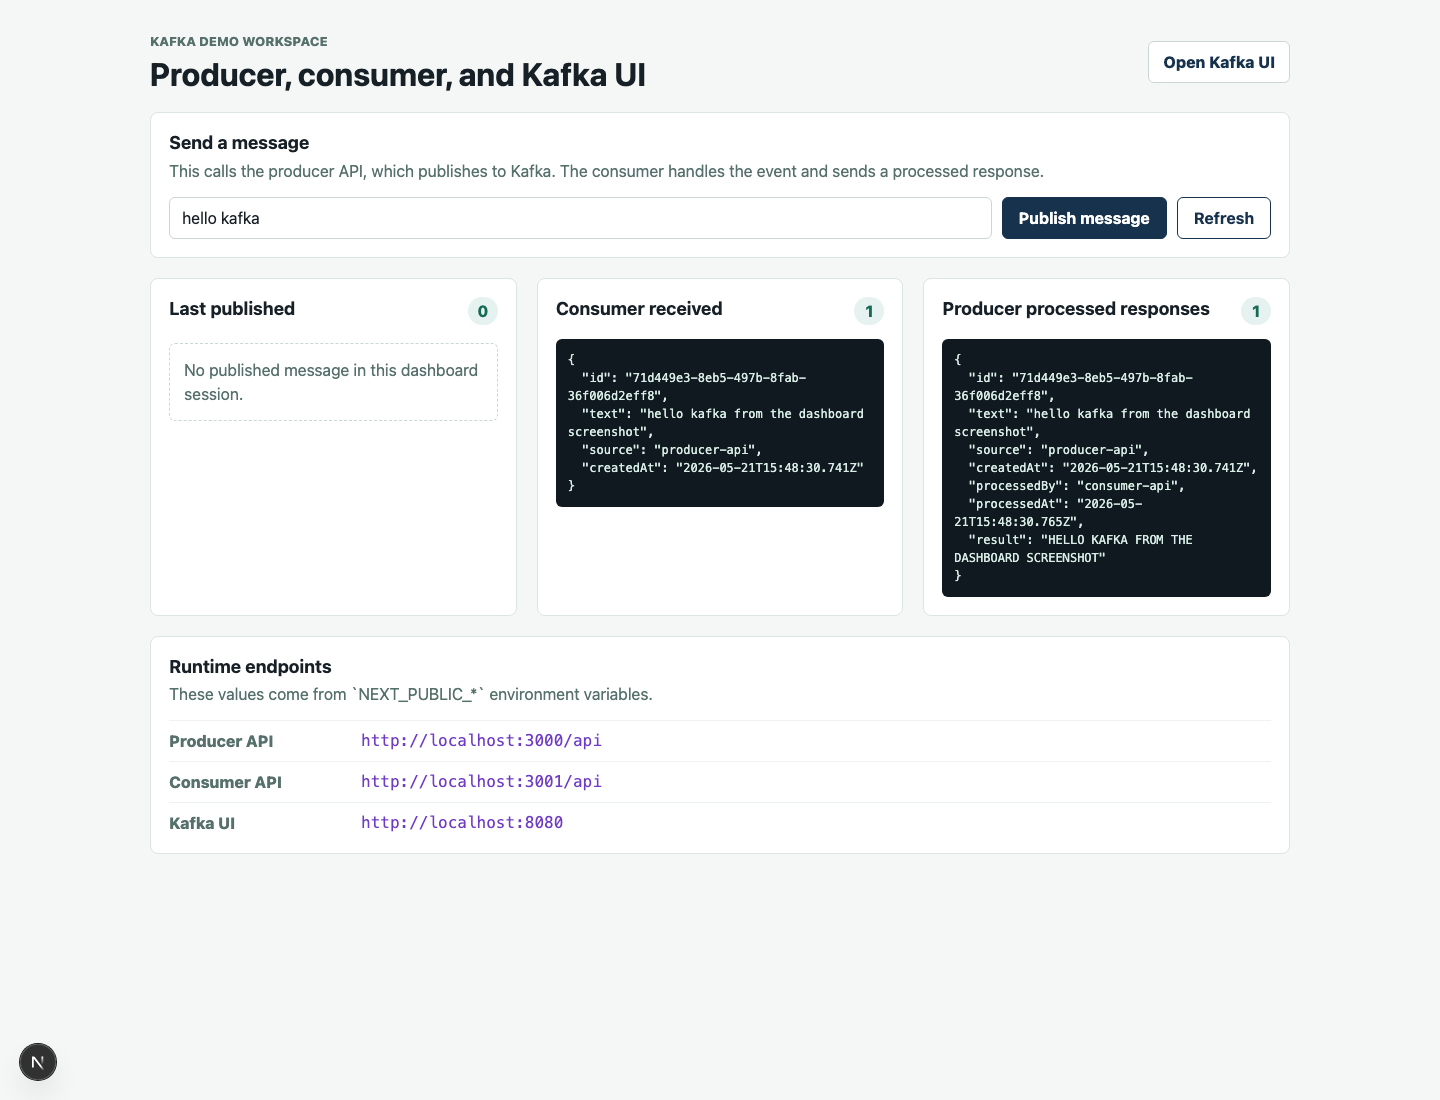
For a base implementation project, this is useful because it proves the system works end to end:
- HTTP request enters the producer API.
- Kafka event is published.
- Consumer API receives the event.
- Consumer API publishes a response event.
- Producer API receives the processed event.
- The UI can display the flow.
That makes the repository easier to use as a starting point for future projects.
Testing and quality gate ✅
The project includes tests across the apps and libraries. You can run all tests with:
npm test
There is also a quality gate script:
npm run quality:gate
The quality gate runs tests, linting, and other checks so the base project does not become a collection of examples that only work manually.
This matters for infrastructure-style libraries. If the shared Kafka module breaks, every app that depends on it can be affected.
Possible next steps 🧭
This project is a base, so it intentionally does not try to solve every production concern. Some good next improvements would be:
- validate events before publishing and after consuming;
- add a schema strategy, for example with JSON Schema, Zod, Avro, or Protobuf;
- add correlation IDs to connect logs across producer and consumer apps;
- add retry behavior and dead-letter topics;
- persist consumed and processed messages instead of keeping them in memory;
- add tracing and metrics;
- split local topic provisioning from production topic management;
- add authentication and authorization for real Kafka clusters.
I would not add all of this before the first working version. My preference is to keep the base small, prove the architecture, and then add the missing production pieces according to the real needs of the project.
Conclusion 👨🏼🔧
This project gives you a practical starting point for Kafka with NestJS:
- a reusable Kafka module;
- a typed messaging component;
- shared topic constants;
- shared event interfaces;
- topic provisioning for local development;
- two NestJS apps proving producer and consumer behavior;
- a dashboard for manual testing;
- Docker Compose with Kafka and Kafka UI;
- tests around the shared infrastructure.
The main idea is to start with a clean boundary. Application code should talk in terms of events and use cases. Kafka setup, client lifecycle, topic provisioning, and transport details should live in shared infrastructure.
That separation is what makes this base implementation useful beyond the first demo.
Takeaways ✍️
- Keep topic names and event contracts shared.
- Avoid duplicating Kafka client setup in every app.
- Use Docker Compose to make local development easier.
- Use Kafka UI while learning and debugging the message flow.
- Treat topic provisioning differently for local development and production.
- Start small, prove the flow, and add production concerns when they are actually needed.