
Hi dear reader!
Today I'm going to talk about how to create a TinyMCE 6 Plugin using ReactJS and Typescript. This was an exciting experience, so I decided to write a little bit to express my ideas and help the internet with this content, which was not so easy to find something about.
Why did I implement it?
I was looking for marketing solutions that offer a text editor with basic and advanced features that was Free for the community and with a good license for use inside other projects, but especially because I had to change one existent tool (and expensive) from one project in order to reduce the project cost.
What was done?
As I commented before, this project uses ReactJS and Typescript, even though TinyMCE's website has excellent documentation, there is not good documentation related to Plugins and how to build them, especially with ReactJS and Typescript.
As you can see, it is possible to interact between the Plugin and TinyMCE. 👇🏻
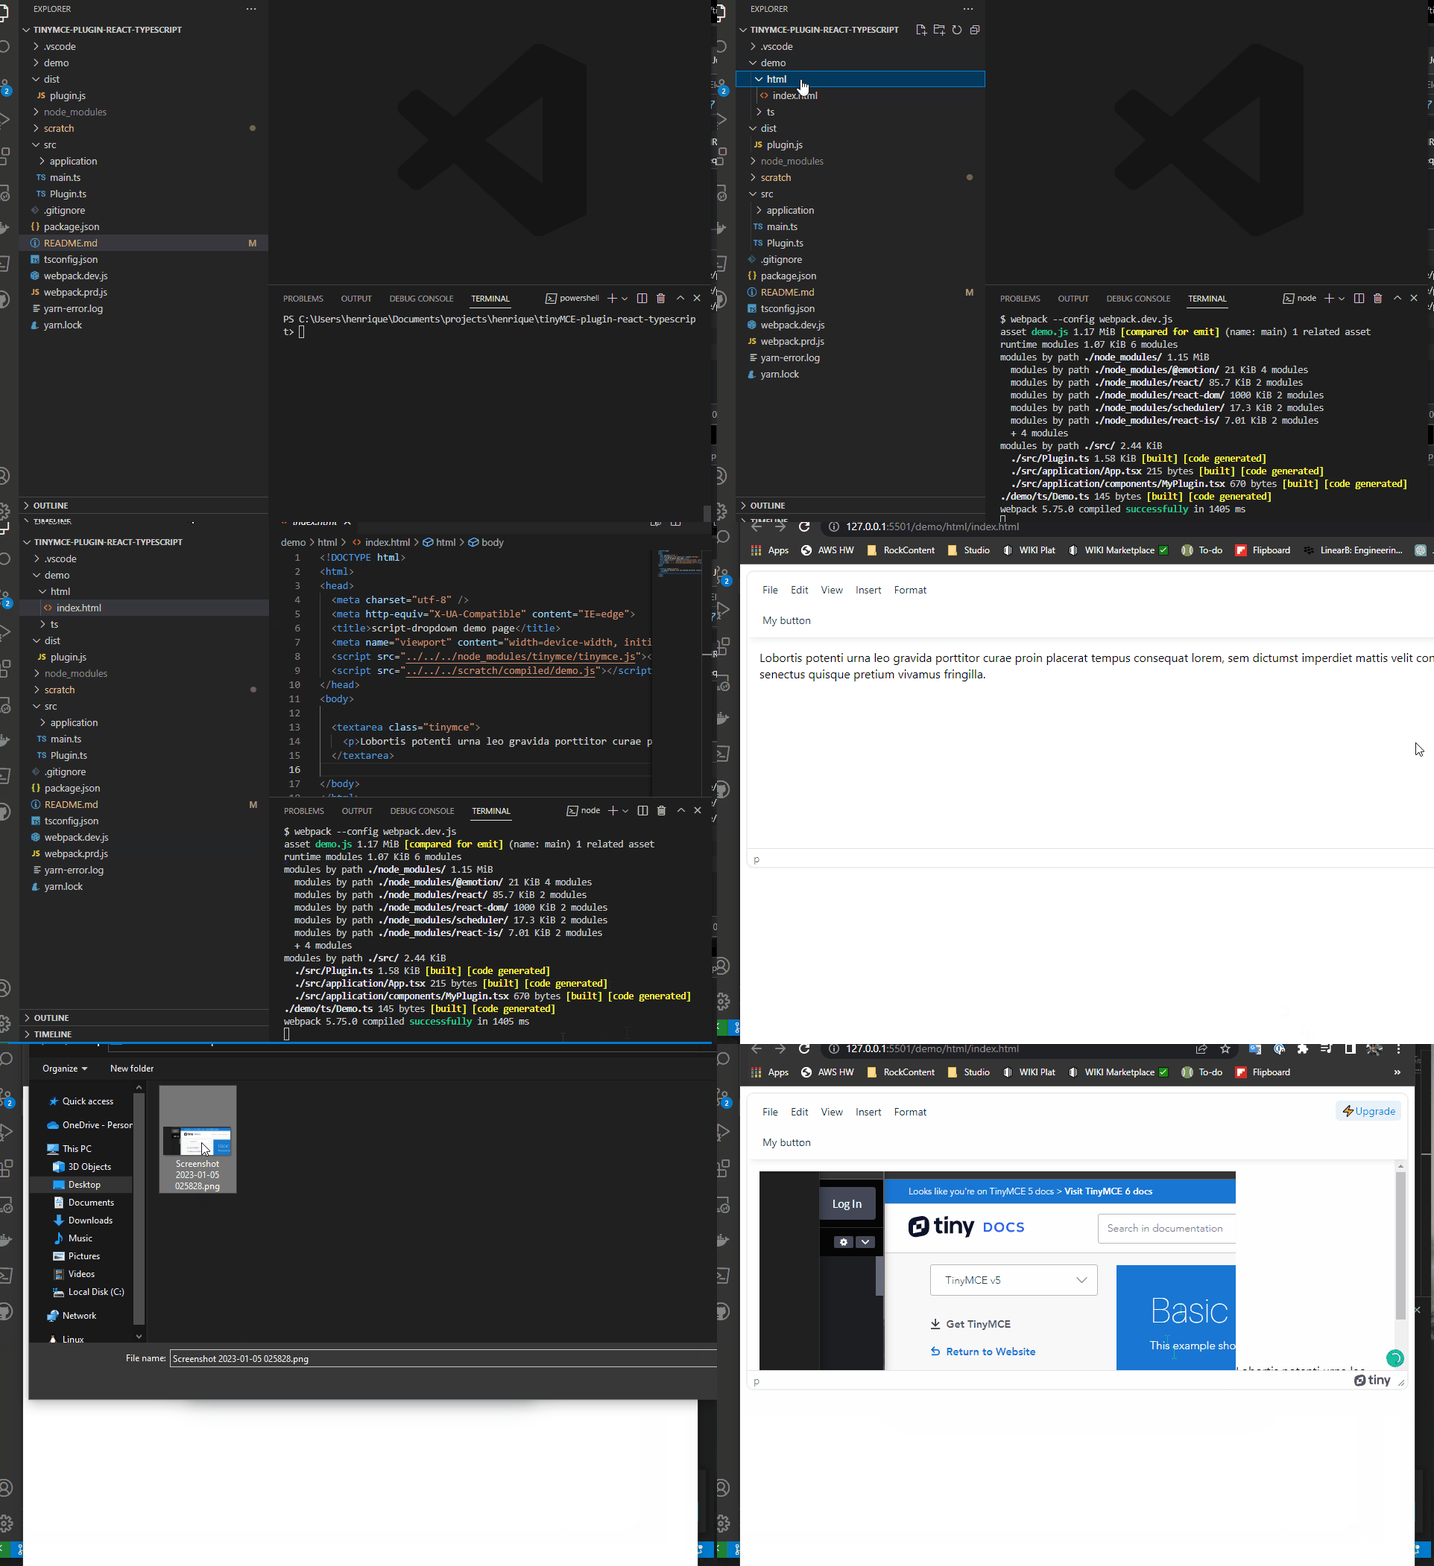
I made some changes after I recorded this gif, sorry 😣
Where did I start?
With the idea in my mind, the first step was asking my new friend ChatGPT-3 how to build that, and I have to say that it gave me a great idea and the way to implement it; however, it was not enough, so I had to do my own google search. After some minutes looking for it, I finally found a good article written by Andre Marques, with content very, very close to what I wanted to do! 🤩
I used his repository as an example to test and see the items that I commented on in the first section, but I noticed that the project used an old version of NodeJS and also some libs. Besides that, Andre's repository was making a plugin that applied a menu and submenu, and I didn't want that, I wanted some close to real use, so I started a new codebase for my own but based on his ideas and architecture, as you can check.
This is the link to André Marques' article
Create TinyMCE plugins with React, Typescript, Jest, and Webpack
How did I start?
As I already had a codebase from Andre’s repository, I could skip the part of the configuration; however, I wanted to update the node version and the libs because I usually use node 18 or above.
I noticed that this project had a lot of dependencies that I could remove because they weren’t used, so I did that and then updated the rest of the packages.
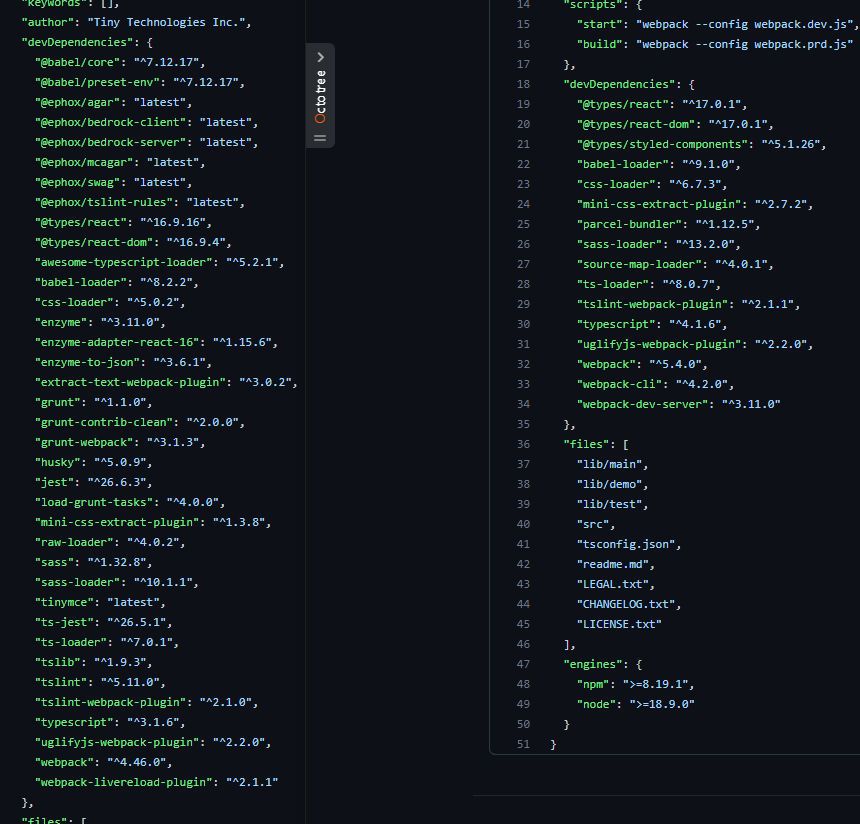
The left side is before, and the right side is after some changes
The most difficult part was putting the project to run. It because, as I had updated many libraries (package.json), the webpack in general has broken. In this case I had to take one step back and review the webpack.dev.js configuration.
The first step is done! ✅
Now it’s time to focus on the plugin, in fact. As I said Andre’s plugin had a different approach, where he was adding an option on the TinyMCE as a Plugin 👇
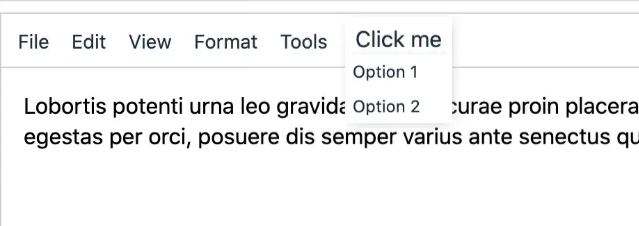
His codebase had a good organization with the separation of ReactJS and TinyMCE, so I decided to take the same approach
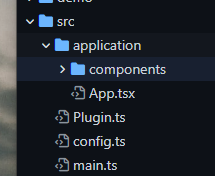
My codebase started to be different than his repository when we take a look at Plugin.ts because here, I put the interaction as a Plugin and not as a menu, besides some changes because I was using a new version of TinyMCE.
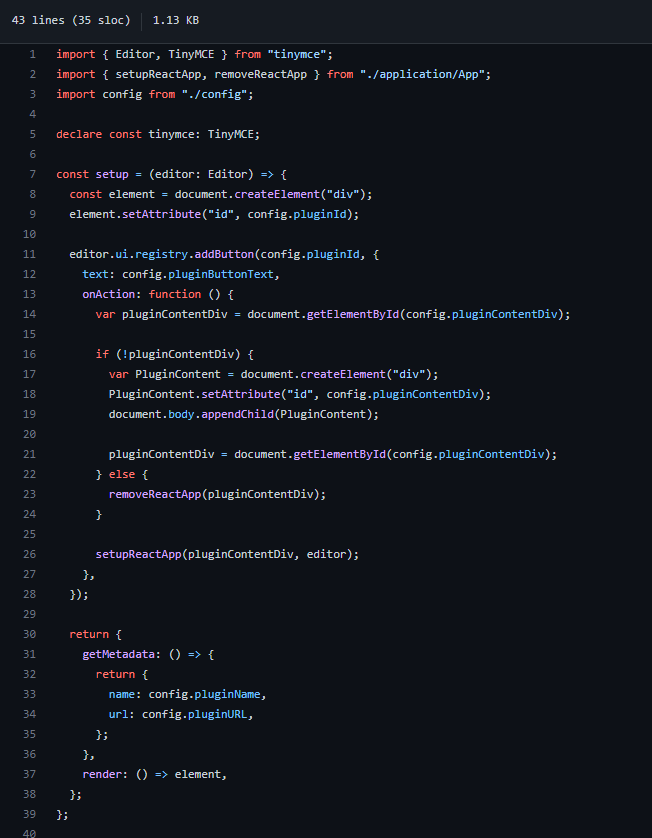
Source: https://github.com/henriqueweiand/tinyMCE-plugin-react-typescript/blob/master/src/Plugin.ts
import { Editor, TinyMCE } from "tinymce";
import { setupReactApp, removeReactApp } from "./application/App";
import config from "./config";

declare const tinymce: TinyMCE;

const setup = (editor: Editor) => {
  const element = document.createElement("div");
  element.setAttribute("id", config.pluginId);

  editor.ui.registry.addButton(config.pluginId, {
    text: config.pluginButtonText,
    onAction: function () {
      var pluginContentDiv = document.getElementById(config.pluginContentDiv);

      if (!pluginContentDiv) {
        var PluginContent = document.createElement("div");
        PluginContent.setAttribute("id", config.pluginContentDiv);
        document.body.appendChild(PluginContent);

        pluginContentDiv = document.getElementById(config.pluginContentDiv);
      } else {
        removeReactApp(pluginContentDiv);
      }

      setupReactApp(pluginContentDiv, editor);
    },
  });

  return {
    getMetadata: () => {
      return {
        name: config.pluginName,
        url: config.pluginURL,
      };
    },
    render: () => element,
  };
};

export default () => {
  tinymce.PluginManager.add(config.pluginId, setup);
};
There is a secret here, as you can see, I had to put a few lines of rules related to ReactJS to verify if the element already exists in order to create or only add the component.
After that, we have the setupReactApp function, which create is using the ReactJS lib to render the ReactJS plugin in fact. From here to ahead, it is totally ReactJS, my friends!
Oh!! I almost forget to comment on one important detail related to one parameter:
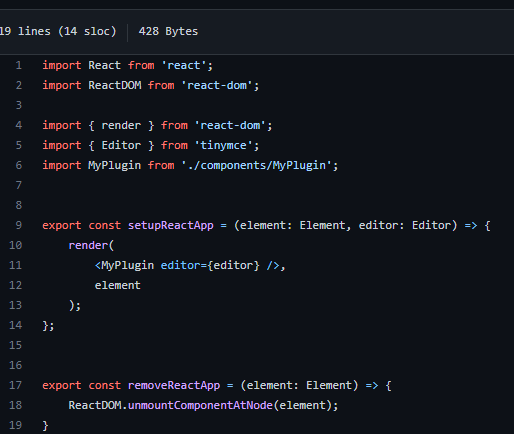
The parameter editor will help us able to interact with all events from the TinyMCE.
After this part, I create a simple Modal component, and inside that one option to select a file in order to put it inside of TinyMCE, as you can see on the gif at the top of this post.
That is it for today! Thanks for your time reading my post and I hope it will help you to create amazing plugins for TinyMCE with ReactJS. 😎