Hello fellow coders! Today we are going to talk about something simple that basically everybody and every project does, which is using ENVs inside a project, it can be database credentials, project port, name of queue, or whatever else.
Doing this configuration can be also easy to do, you just need to use the ConfigModule right? Yeah, it is basically like that, and just with a few lines of code it is already working, however, today I want to share some cool tips to enhance the quality of this module that you are importing to your project the points that we are going to check out are:
- Creating a module to have this ENV ConfigureModule with as little accomplishment as possible
- Configure it to use as many as features Typescript can offer us.
Creating the project
Let's start by creating a new project that I am going to call nestjs-config-module
nest new nestjs-config-module
Creating a module
In order to have a well strucuture and segmented project I striongly recommend to create a new module to be in charge of dealing with the envs for you, so when necessery you will only need to maintain one central place when talk about enviroment variables. Let's do it
nest g module env
We also will need a service, so let's use the copmmand line again
nest g service env
Well done! We are going to use two dependencies, so before we continue the project let's install them as well.
yarn add zod @nestjs/config
As we are planning to use this module as a base to the other import and use the methods, we have to turn this module importable, that the reason that we are exporting our service here
import { Module } from '@nestjs/common';
import { EnvService } from './env.service';

@Module({
  providers: [EnvService],
  exports: [EnvService],
})
export class EnvModule { }
Before edit our service, we will need to create a file called env.ts, with this content
import { z } from 'zod';

export const envSchema = z.object({
  PORT: z.coerce.number().optional().default(3000),
});

export type Env = z.infer<typeof envSchema>;
This is one important file to have in mind because, it will be the responsable for the ENVs inside of your project and using zod you can create the whole type of each one of the vars and also define a default when necessery (Very useful).
To know more about ZOD, please check out this link.
The method z.infer in this example is what create the magic of having a type outomaticly.
Next, let's edit our env.service.ts and here we just need to something like this
import { Injectable } from '@nestjs/common';
import { ConfigService } from '@nestjs/config';
import { Env } from './env';

@Injectable()
export class EnvService {
    constructor(private configService: ConfigService<Env, true>) { }

    get<T extends keyof Env>(key: T) {
        return this.configService.get(key, { infer: true });
    }
}
IMPORTANT: we are using ConfigService inside this service and we are not importing it in our EnvModule indeed, I know it. I am doing like that because we are going to check now the app.module.tswhere we are going to add the global module.
import { Module } from '@nestjs/common';
import { AppController } from './app.controller';
import { AppService } from './app.service';
import { EnvModule } from './env/env.module';
import { envSchema } from './env/env';
import { ConfigModule } from '@nestjs/config';

@Module({
  imports: [
    ConfigModule.forRoot({
      validate: (env) => envSchema.parse(env),
      isGlobal: true,
    }),
    EnvModule,
  ],
  controllers: [AppController],
  providers: [AppService],
})
export class AppModule { }
Here we are importing the ConfigModule and setting as a global module in the hiest module that this project has, so our EnvModule can use it and other part of the code as well, which is useful somethings for tests or whatever else. The validate index is setting our schema from env.ts
that shares the type that will be validated when the application starts.
At the root of your project, you have to create a file called .env where you need to put the envs that are going to be loaded when the app starts.
And that's all!
Why is it so useful?
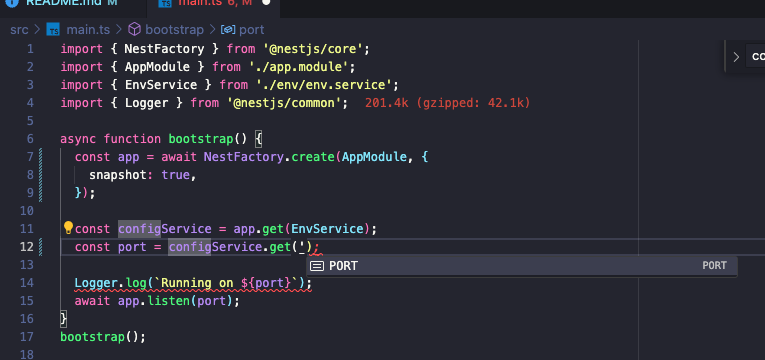
With this approach as I mentioned before, we are centralizing inside one module how to handle vars, we are validation if the project has all necessery variables to run, we are also using resouces from the editor to help us to check which variables are available.